Working with Thingy:53
Nordic Thingy:53 is a battery-operated prototyping platform for IoT Systems.
Note
As of the nRF Connect SDK v1.7.0 release, Thingy:53 is an unreleased product that will be released in the near future.
Thingy:53 integrates the following components:
nRF5340 SoC - Supporting Bluetooth® Low Energy, IEEE 802.15.4 based protocols and Near Field Communication (NFC).
nRF21540 RF FEM - Range extender with integrated power amplifier (PA)/low-noise amplifier (LNA).
nPM1100 PMIC - Power Management IC with integrated dual-mode buck regulator and battery charger.
For more information on the product, see the Thingy:53 product page and the Nordic Thingy:53 User Guide. The nRF Connect SDK provides support for developing applications on the Thingy:53.
Connecting to Thingy:53 serial ports
Thingy:53 applications and samples use a serial terminal to provide logs. By default, the serial terminal is accessible through the USB CDC ACM class handled by application firmware. The serial port is visible right after the Thingy:53 is connected to the host using a USB cable. The CDC ACM baudrate is ignored, and transfer goes with USB speed.
Tip
Some of the samples and applications compatible with Thingy:53 may provide multiple instances of USB CDC ACM class. In that case, the first instance is used to provide logs, and the others are used for application-specific usages.
Firmware
Nordic Thingy:53 comes preprogrammed with the Edge Impulse firmware. This allows the Thingy:53 to connect to Edge Impulse Studio over Bluetooth LE using the nRF Edge Impulse mobile application, or through USB on your PC. The firmware allows you to capture sensor data, which in turn you can use to train and test machine learning models in Edge Impulse Studio. You can deploy trained machine learning models to the Nordic Thingy:53 through an over-the-air (OTA) update using Bluetooth LE, or update over USB using nRF Connect Programmer.
See the Nordic Semi Thingy:53 page in the Edge Impulse documentation on how to use the Nordic Thingy:53 with the nRF Edge Impulse mobile application and Edge Impulse Studio.
There are also multiple samples in the nRF Connect SDK that you can run on the Nordic Thingy:53.
Programming precompiled firmware images
Precompiled firmware image files are useful in the following scenarios:
Restoring the firmware to its initial image.
Updating the application firmware to a newly released version.
Testing different features of the Nordic Thingy:53.
Downloading precompiled firmware images
To obtain precompiled images for updating the firmware, perform the following steps:
Go to the Thingy:53 product page and under the Downloads tab, navigate to Precompiled applications.
Download and extract the latest Thingy:53 firmware package.
Check the
CONTENTS.txtfile in the extracted folder for the location and names of the different firmware images.
Quick programming of precompiled firmware images
After downloading firmware images, you can program them directly onto the Thingy:53 using the nRF Connect Programmer application available in nRF Connect for Desktop. The downloaded firmware package is a zip archive containing signed application binaries.
See Updating firmware image for detailed information about updating firmware on Thingy:53.
Building and programming from the source code
You can also program the Thingy:53 by using the images obtained by building the code in the nRF Connect SDK environment.
To set up your system to be able to build a compatible firmware image, follow the Getting started guide for the nRF Connect SDK. The build targets of interest for Thingy:53 in the nRF Connect SDK are listed on the table below. Note that building for the non-secure application core is not fully supported.
Component |
Build target |
|---|---|
nRF5340 SoC - Application core |
|
nRF5340 SoC - Network core |
|
Note
The nRF Connect SDK samples and applications that are compatible with Thingy:53 follow the Thingy:53 application guide. This is needed, because the samples must use consistent partition map and bootloader configuration.
The nRF Connect SDK by default uses Multi-image builds for Thingy:53.
Because of this, when you choose thingy53_nrf5340_cpuapp when building a sample or application that is compatible with Thingy:53, you will generate firmware for both the application core and network core:
The applicaton core firmware consists of MCUboot bootloader and an application image.
The network core firmware consists of network core bootloader (B0n) and application firmware of the network core.
The build process generates firmware in two formats:
Intel Hex file (
merged_domains.hex) - Used with an external debug probe. The file contains bootloaders and applications for both cores.Binary files (
app_update.bin,net_core_app_update.bin), containing signed application firmwares for the application and network core, respectively. For convenience, the binary files are bundled indfu_application.ziptogether with manifest that describes them. The binary files or the combined zip archive can be used to update application firmware for both cores, with either MCUboot serial recovery or OTA DFU using Bluetooth LE.
The following table shows the relevant types of build files that are generated and the different scenarios in which they are used.
File |
File format |
Programming scenario |
|---|---|---|
|
Full image for both cores |
Using an external debug probe and nRF Connect Programmer |
|
MCUboot compatible application core update |
Using the built-in bootloader and nRF Connect Programmer |
|
MCUboot compatible network core update |
Using the built-in bootloader and nRF Connect Programmer |
|
MCUboot compatible update images for both cores |
Using nRF Programmer for Android and iOS or nRF Connect Programmer |
See the following sections for details regarding building and programming the firmware for Thingy:53 in various environments. If your Thingy:53 is already programmed with Thingy:53-compatible sample or application, then you can also use the MCUboot bootloader to update the firmware after you finish building. See Updating firmware image for more detailed information about updating firmware on Thingy:53.
Building and programming using SEGGER Embedded Studio
Complete the following steps to build nRF Connect SDK projects with SES after installing SEGGER Embedded Studio and completing the first time setup:
Start SEGGER Embedded Studio.
If you have installed the nRF Connect SDK using the Toolchain Manager, click the Open Segger Embedded Studio button next to the version you installed to start SES. If you have installed SES manually, run the
emStudioexecutable file from thebindirectory.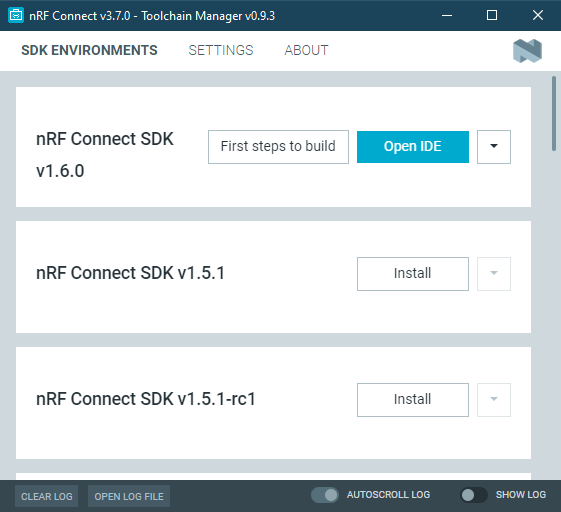
The Toolchain Manager options after installing the nRF Connect SDK version
Select File > Open nRF Connect SDK Project.
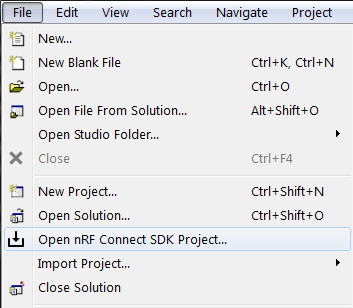
Open nRF Connect SDK Project menu
To import a project into SES, you must specify the following information:
nRF Connect SDK Release - Select the nRF Connect SDK version that you want to work with.
The drop-down list contains the current version of all nRF Connect SDK installation directories that SES knows about. To add a missing nRF Connect SDK installation directory to that list, run
west zephyr-exportin the installation repository or define the Zephyr base to point to the directory (see Set up the build environment in SES).nRF Connect Toolchain Version - If you used the Toolchain Manager to install the nRF Connect SDK, select the version of the toolchain that works with the selected nRF Connect SDK version. Otherwise, select NONE and make sure that your SES environment is configured correctly (see Set up the build environment in SES).
Note
The drop-down list contains only toolchain versions that are compatible with the selected nRF Connect SDK version.
Projects - Select the project that you want to work with.
The drop-down list contains a selection of applications from the sdk-nrf and sdk-zephyr repositories. Select any of the checkboxes underneath to add the applications from that area to the drop-down list. To add projects to the drop-down list, for example, your own custom projects, click … and select the folder that contains the projects that you want to add.
Board Name - Select the board that you want to work with.
The drop-down list contains the build targets for all Nordic Semiconductor boards that are defined in the sdk-nrf and sdk-zephyr repositories. Select any of the checkboxes underneath to add the build targets from that area to the drop-down list. To add build targets to the drop-down list, for example, targets for your own custom board, click … and select the folder that contains the board definitions.
Build Directory - Select the folder in which to run the build. The field is filled automatically based on the selected board name, but you can specify a different directory.
Clean Build Directory - Select this option to ensure that you are not building with an outdated build cache.
Extended Settings - Select this option to display a field where you can specify additional CMake options to be used for building. See Providing CMake options.
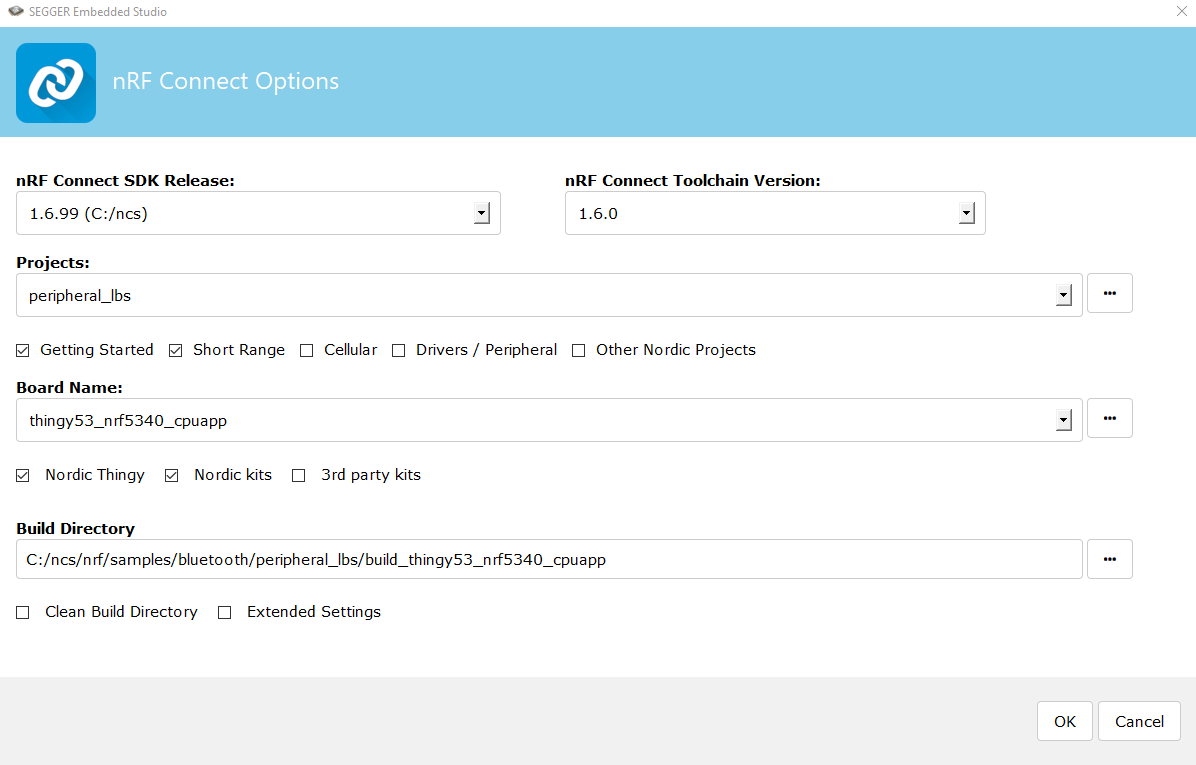
Opening the
peripheral_lbsapplication for thethingy53_nrf5340_cpuappbuild target¶Note
The
Board Directoryfolder is atncs/nrf/boards/arm.
Click OK to import the project into SES. You can now work with the project in IDE.
Build the sample or application:
Select your project in the Project Explorer.
From the menu, select Build > Build Solution. This builds the project.
The output of the build with the merged Intel Hex file, containing the application, the net core image, and the bootloaders, is located in the
zephyrsubfolder in the build directory.Program the sample or application:
Connect the Thingy:53 to the debug out port on a 10-pin external debug probe, for example nRF5340 DK (Development Kit), using a 10-pin JTAG cable.
Connect the external debug probe to the PC using a USB cable.
Make sure that the Thingy:53 and the external debug probe are powered on.
in SES, select Target > Connect J-Link.
Select Target > Download zephyr/merged.hex to program the sample or application onto Thingy:53.
The device will reset and run the programmed sample or application.
Warning
Programming merged.hex file updates only the application core.
If you also need to update the network core, you must follow additional steps described in Working with nRF53 Series.
Building and programming using Visual Studio Code
Complete the following steps after installing the nRF Connect for Visual Studio Code extension in Microsoft Visual Studio Code:
Open Visual Studio code.
Click on the nRF Connect for VS Code icon in the left navigation bar and then click Open.
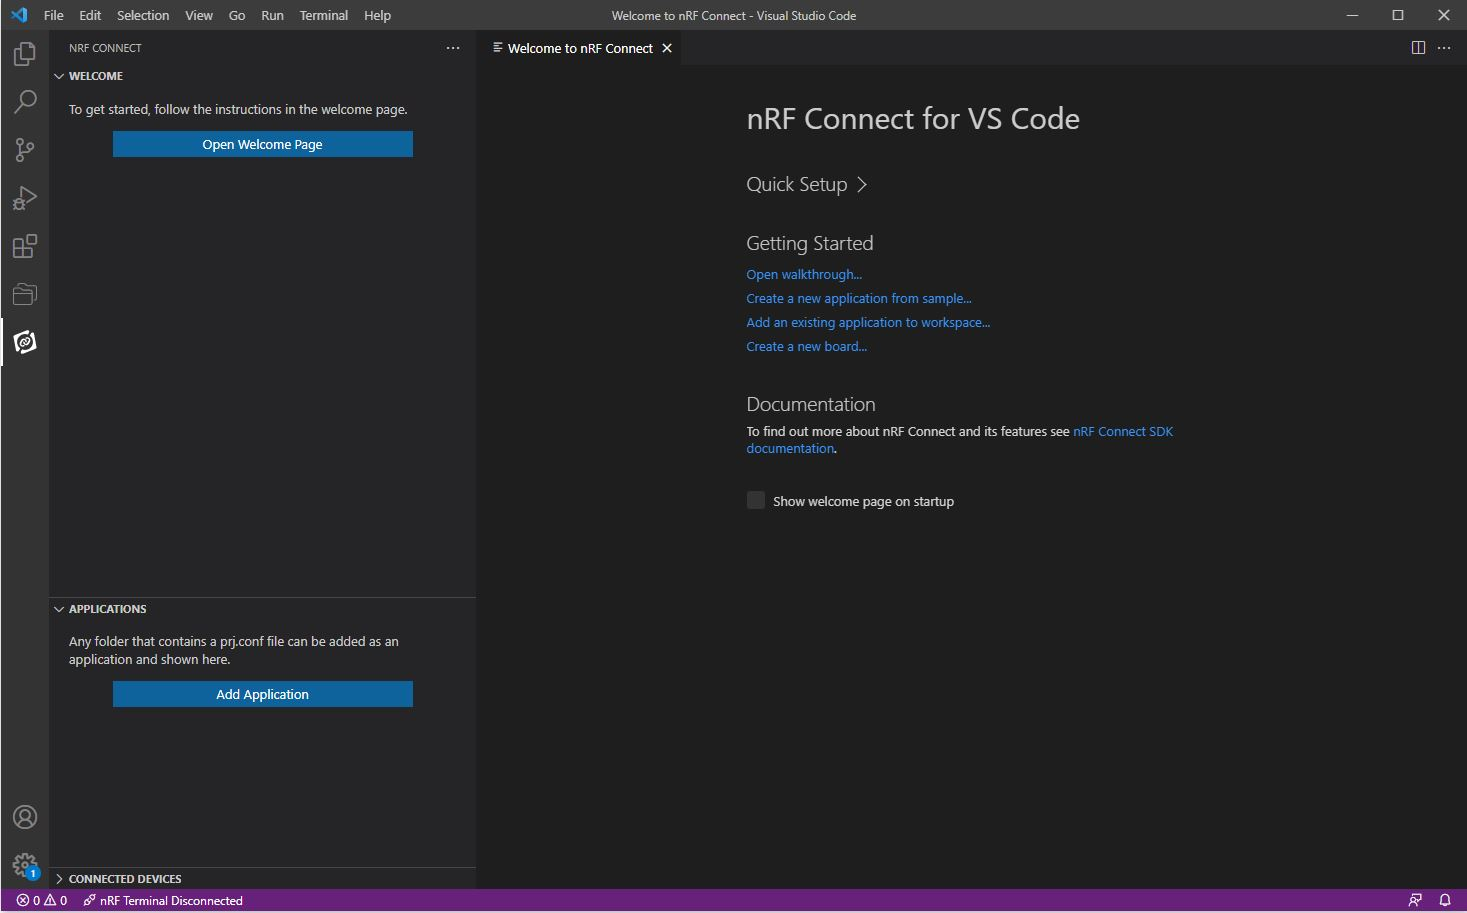
The welcome page for nRF Connect for VS Code.
Click on Add an existing applicaton to workspace….
In the prompt, navigate to the folder containing the sample you want to build, such as
nrf\samples\bluetooth\peripheral_lbs. You should now see the selected application in the Applications window in the lower left corner.Note
The sample folder must contain a
prj.conffile.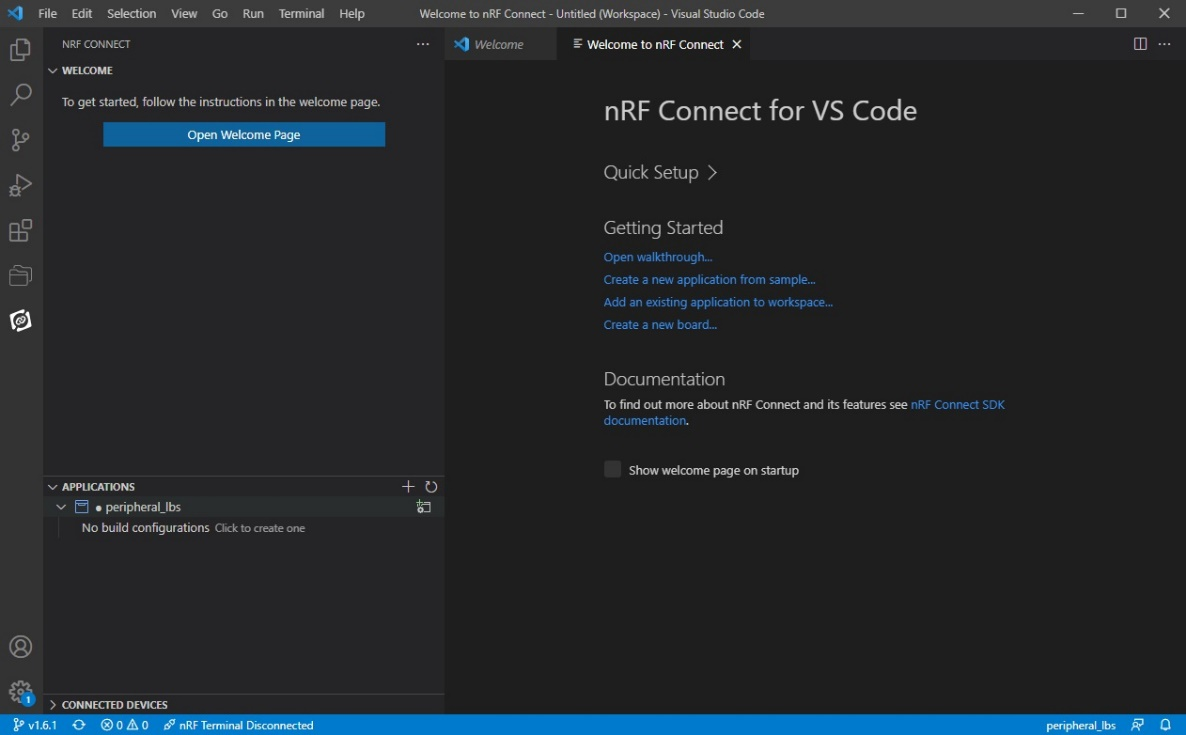
The peripheral_lbs application is now available in the Application window.
Click on the Add Build Configuration button in the Application window, or click on the text stating No build configurations. Click to create one. This opens the Generate Configuration window in a new tab.
Select the
thingy53_nrf5340_cpuappas the target board and click Generate Config, which generates the configuration file and triggers the build process.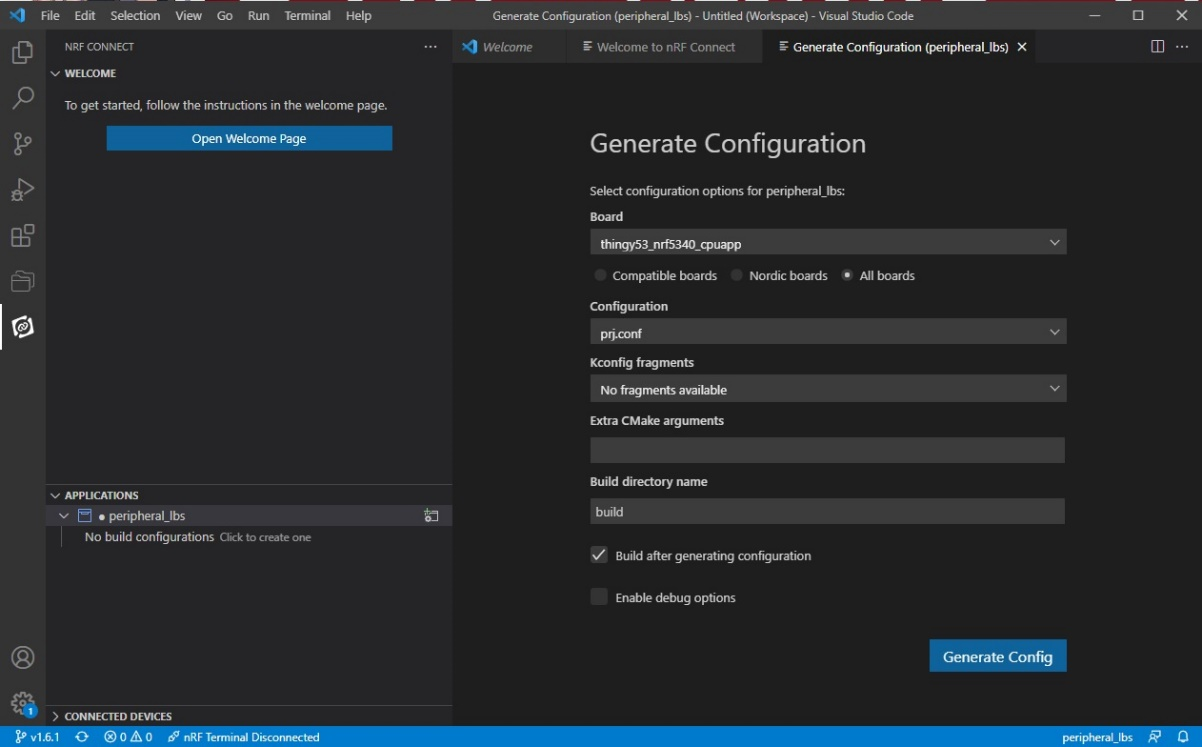
The Generate Configuration window, with
thingy53_nrf5340_cpuappas the board.¶When the build configuration and the build are complete, an Actions window appears in the lower left corner of Visual Studio Code. In this window, you can trigger the build process, program the built sample or start a debug session.
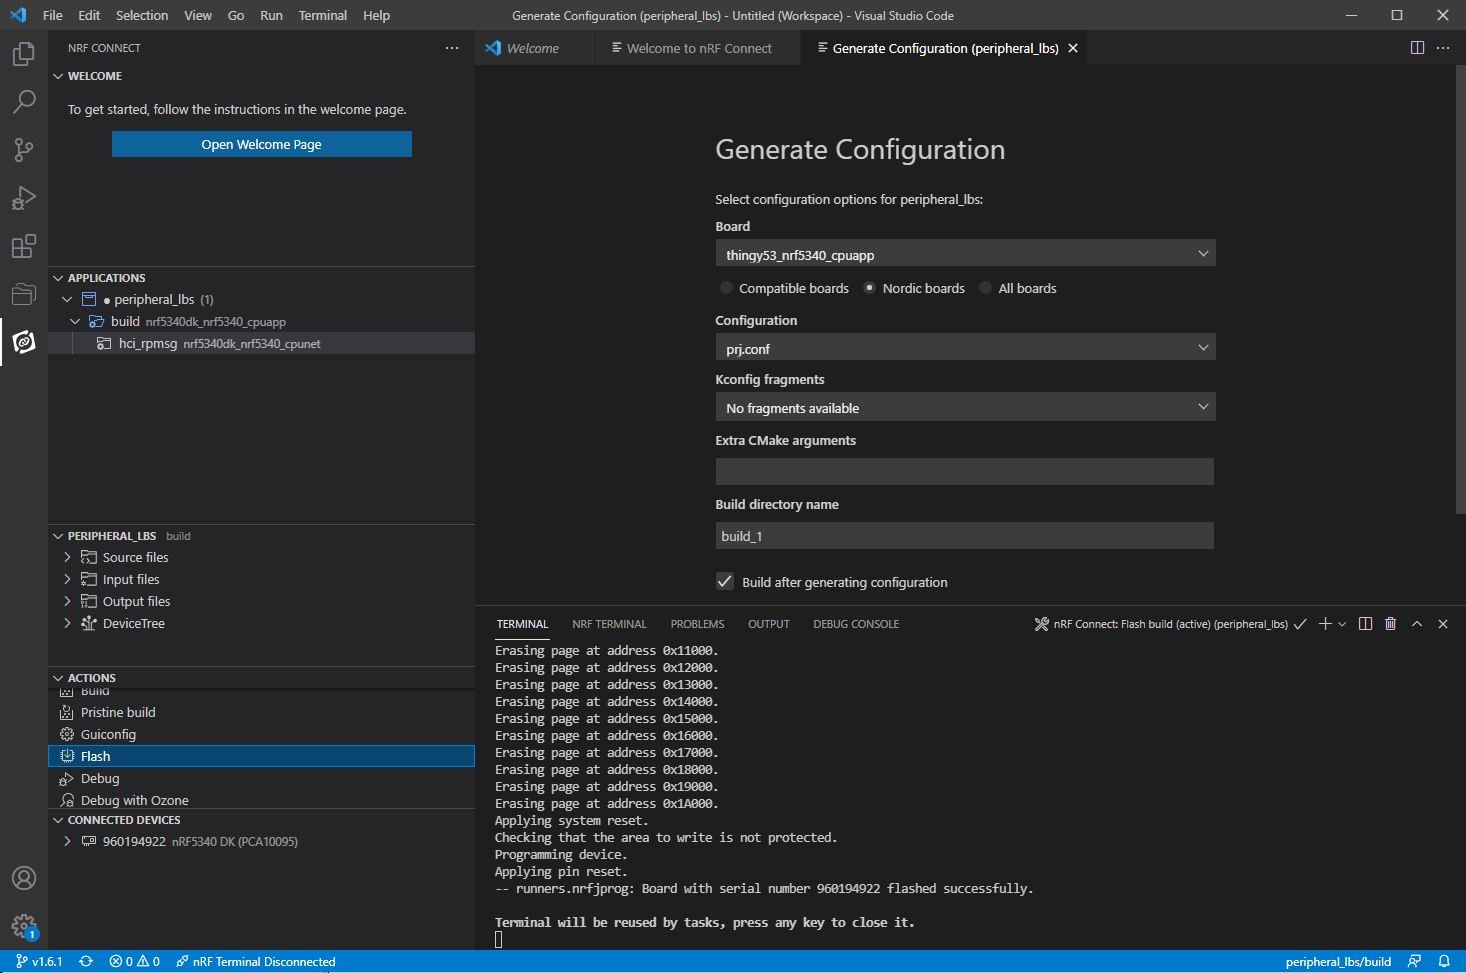
The Actions window is open in the lower left corner
Program the sample or application:
Connect the Thingy:53 to the debug out port on a 10-pin external debug probe, for example nRF5340 DK, using a 10-pin JTAG cable.
Connect the external debug probe to the PC using a USB cable.
Make sure that the Thingy:53 and the external debug probe are powered on.
Click Flash in the Actions window.
Building and programming on the command line
Before you start building an nRF Connect SDK project on the command line, you must Set up the command-line build environment.
To build and program the source code from the command line, complete the following steps:
Open a command line or terminal window.
Go to the specific directory for the sample or application.
For example, the full directory path is
ncs/nrf/applications/machine_learningwhen building the source code for the nRF Machine Learning application.Make sure that you have the required version of the nRF Connect SDK repository by pulling the
sdk-nrfrepository on GitHub as described in Obtaining a copy of the nRF Connect SDK and Updating a copy of the nRF Connect SDK sections.Get the rest of the dependencies using west:
west update
Build the sample or application code as follows:
west build -b thingy53_nrf5340_cpuapp -d destination_directory_name
Program the sample or application:
Connect the Thingy:53 to the debug out port on a 10-pin external debug probe, for example nRF5340 DK, using a 10-pin JTAG cable.
Connect the external debug probe to the PC using a USB cable.
Make sure that the Thingy:53 and the external debug probe are powered on.
Use the following command to program the sample or application to the device:
west flash
The device resets and runs the programmed sample or application.
Updating firmware image
The firmware on Thingy:53 can be programmed using an external debug probe and 10-pin JTAG cable, as described in the sections above for building in the different environments. You can also update applications running on both network and application core using the built-in MCUboot bootloader and nRF Connect Programmer or the nRF Programmer for Android or iOS. Prebuilt application images can also be updated that way. See subsections below for details about updating firmware image.
Firmware update using external debug probe
If you are using an external debug probe, such as the nRF5340 DK, or any J-Link device supporting ARM Cortex-M33, you do not have to use applications that follow the Thingy:53 application guide. In that case, you can program the Thingy:53 in a similar way as nRF53 DK. See Working with nRF53 Series for details. Keep in mind that you will need to program a sample or application compatible with Thingy:53 application guide to bring back serial recovery and DFU OTA.
Firmware update using MCUboot bootloader
The Thingy:53-compatible samples and applications use MCUboot bootloader than can be used to update firmware.
This method uses signed binary files app_update.bin and net_core_app_update.bin (or dfu_application.zip).
You can program the precompiled firmware image using one of the following ways:
Use the MCUboot feature and the built-in serial recovery mode of Thingy:53. In this scenario Thingy is connected directly to your PC through USB.
Update the firmware over-the-air (OTA) using Bluetooth LE and the nRF Programmer mobile application for Android or iOS. To use this method, the application that is currently programmed on Thingy:53 must support it. All precompiled images support OTA using Bluetooth.
See Updating Nordic Thingy:53 firmware for the detailed procedures on how to program a Thingy:53 using nRF Connect Programmer or the nRF Programmer for Android or iOS.
Thingy:53 application guide
Thingy:53 does not have a built-in J-Link debug IC. Because of that, the samples and applications that are compatible with Thingy:53 by default use MCUboot bootloader with serial recovery support. Thingy:53-compatible applications can be updated using DFU functionality with either nRF Connect Programmer or nRF Programmer mobile application.
Enabling DFU and MCUboot requires consistency in configuration of the samples and applications. For a sample or application to be compatible with Thingy:53, the application must comply with the following configuration:
- Partition manager configuration
Thingy:53 compatible samples use Partition Manager to define memory partitions. To ensure that partition layout does not change between builds, the sample must use static partition layout that is the same as the one in Thingy:53-compatible samples in the nRF Connect SDK. The memory layout must stay consistent, so that MCUboot can perform proper image updates and clean up the settings storage partition.
The PCD SRAM partition is locked by the MCUboot bootloader to prevent the application from modifying the network core firmware. Trying to access data on this partition results in an ARM fault.
- MCUboot bootloader
The sample must enable MCUboot bootloader and use the same configuration of the bootloader as all of the Thingy:53-compatible samples in the nRF Connect SDK. This is needed to let MCUboot use the sample as an image update.
The MCUboot bootloader supports serial recovery and a custom command to erase settings storage partition. Erasing settings parition is needed to ensure that an application would not be booted with incompatible content of settings partition.
In addition to the configurations mentioned above, an application compatible with Thingy:53 is expected to enable the following features:
USB CDC ACM as backend for logger. The logs are provided via USB CDC ACM to allow accessing them without additional hardware.
Most of the Thingy:53-compatible applications and samples use only a single instance of USB CDC ACM that works as logger’s backend. No other USB classes are used. These samples can share common USB product name, vendor ID, and product ID. If a sample supports additional USB classes or more than one instance of USB CDC ACM, it must use dedicated product name, vendor ID, and product ID.
DFU over-the-air via Simple Management Protocol over Bluetooth. The application acts as GATT server and allows the connected Bluetooth Central to perform the firmware update for both application and network core. The Bluetooth configuration is updated to allow quick DFU data transfer. The application supports Simple Management Protocol (SMP) handlers related to:
Image management
Operating System (OS) management – used to reboot device after firmware upload is complete.
Erasing settings partition – needed to ensure that a new application would not be booted with incompatible content in the settings partition that was written by the previous application.
Tip
To use your application with Thingy:53 preprogrammed bootloader, you only must set proper configuration of Partition Manager and MCUboot. Other mentioned features are nice to have, but they are not mandatory.
All of the Thingy:53-compatible applications in the nRF Connect SDK also support the mentioned additional features. Refer to the source code of the samples and applications for examples of implementation.
Samples and applications compatible with Thingy:53
There are already samples and applications in the nRF Connect SDK that comply with Thingy:53 application guide. Some of the samples that are compatible with Thingy:53 are: