Updating the DK firmware using Programmer
Before you begin to update the firmware, download and extract the latest application and modem firmware from the nRF9161 DK Downloads or nRF9160 DK Downloads page, depending on the DK you are using.
The downloaded ZIP archive contains the following firmware:
- Application firmware
The
img_app_blfolder contains full firmware images for different applications. The guides in this section use the image for the Asset Tracker v2 application as an example. Asset Tracker v2 simulates sensor data and transmits it to Nordic Semiconductor’s cloud solution, nRF Cloud.The data is transmitted using either LTE-M or NB-IoT. Asset Tracker v2 first attempts to use LTE-M, then NB-IoT. Check with your SIM card provider for the mode they support at your location.
For the Onomondo SIM card, check the Onomondo LTE-M coverage and Onomondo NB-IoT coverage to see the network coverage for different countries.
For the iBasis SIM card provided with the nRF9160 DK, see iBasis IoT network coverage.
- Application firmware for Device Firmware Update (DFU)
The images in the
img_fota_dfu_binandimg_fota_dfu_hexfolders contain firmware images for DFU. These images are not used in the guides in this section.- Modem firmware
The modem firmware is in a ZIP archive instead of a folder. The archive is named
mfw_nrf9160_ormfw_nrf91x1_, followed by the firmware version number. Do not unzip this file.
Tip
For a more compact nRF Cloud firmware application, you can build and install the Cellular: nRF Cloud multi-service sample. See Configuring and building an application for details on building a firmware sample application.
The CONTENTS.txt file in the extracted folder contains the location and names of the different firmware images.
Complete the steps in the following sections to program applications using the Programmer app from nRF Connect for Desktop. You will need the following USB cables for this purpose:
nRF9161 DK: USB-C cable
nRF9160 DK: micro-USB cable
Updating the modem firmware
To update the modem firmware, complete the following steps.
Tip
If you experience any problems during the process, press Ctrl+R (command+R on macOS) to restart the Programmer app and try again.
Open the Programmer app.
For the nRF9160 DK only: Make sure the PROG/DEBUG SW10 switch on the nRF9160 DK is set to nRF91. On DK v0.9.0 and earlier, this is the SW5 switch.
Connect the DK to the computer with a USB cable, and then turn the DK on.
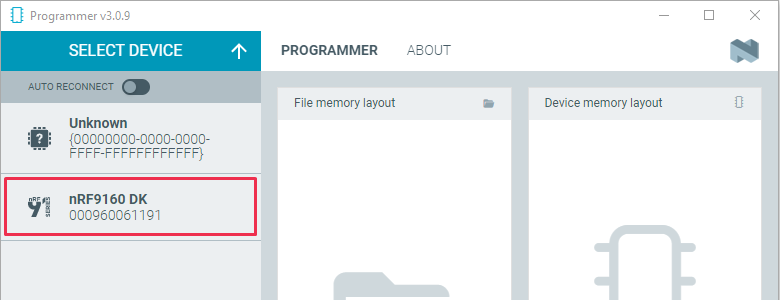
Click SELECT DEVICE and select the DK from the drop-down list.
The drop-down text changes to the type of the selected device, with its SEGGER ID below the name. The Device memory layout section also changes its name to the device name, and indicates that the device is connected. If the Auto read memory option is selected in the J-LINK SETTINGS section of the side panel, the memory layout will update. If it is not selected and you wish to see the memory layout, click Read in the DEVICE section of the side panel.
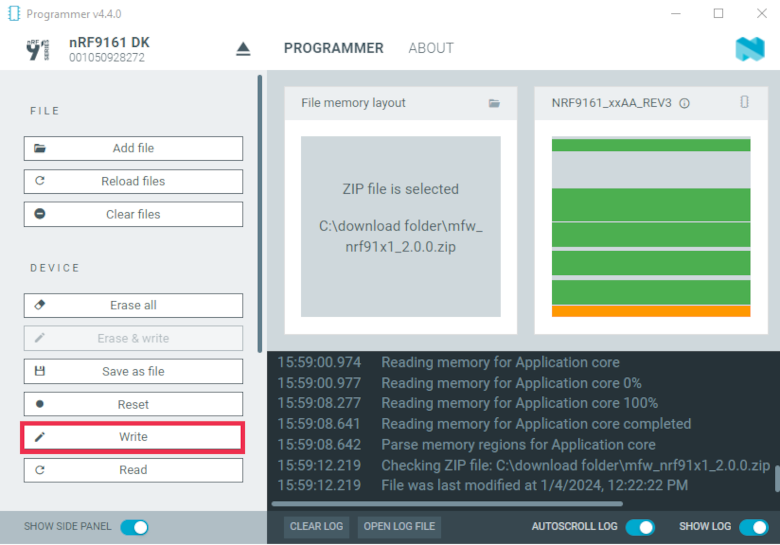
Click Add file in the FILE section, and select Browse.
Navigate to where you extracted the firmware, and select the file for your DK:
nRF9160 DK:
mfw_nrf9160_<version-number>.zipnRF91x1 DK:
mfw_nrf91x1_<version-number>.zip
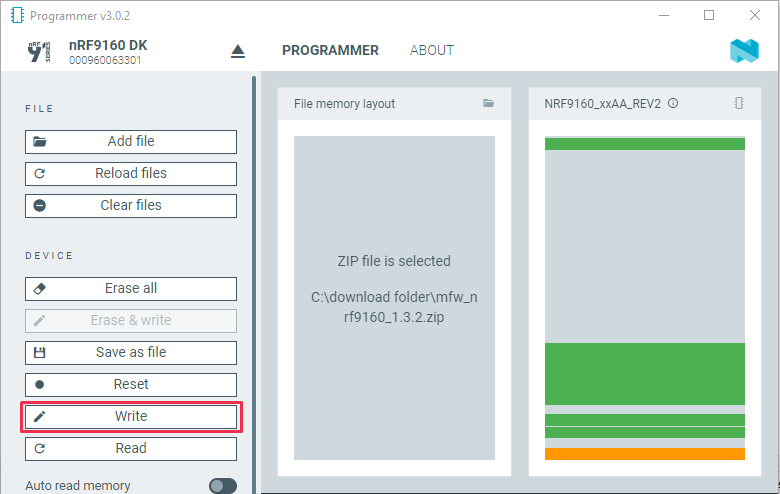
Click Write in the DEVICE section of the side panel.
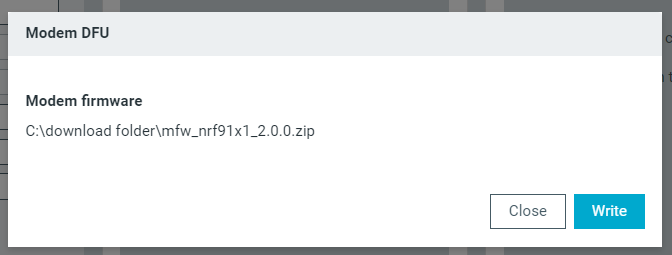
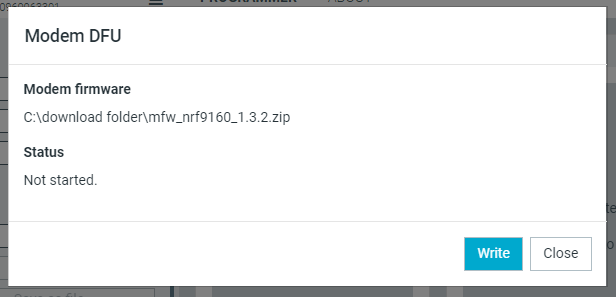
The Modem DFU window appears.
Ignore the warning message and click the Write button in the Modem DFU window to update the firmware. Do not unplug or turn off the device during this process.
When the update is complete, you see a success message. If you update the application firmware now, you can skip the initial steps about connecting and selecting the device in Updating the application firmware.
Note
If you experience problems updating the modem firmware, click Erase all in the DEVICE section of the side panel and try updating again.
Updating the application firmware
To update the application firmware using the Programmer app, complete the following steps.
Tip
If you experience any problems during the process, press Ctrl+R (command+R on macOS) to restart the Programmer app and try again.
Open the Programmer app.
For the nRF9160 DK only: Make sure the PROG/DEBUG SW10 switch (SW5 on DK v0.9.0 and earlier) on the nRF9160 DK is set to nRF91 or nRF52 as appropriate for the application or sample you are programming. See the Device programming section in the nRF9160 DK User Guide for more information.
For the Asset Tracker v2 application, the switch must be set to nRF91.
Connect the DK to the computer with a USB cable, and then turn the DK on.
Click SELECT DEVICE and select the DK from the drop-down list.
The drop-down text changes to the type of the selected device, with its SEGGER ID below the name. The Device memory layout section also changes its name to the device name, and indicates that the device is connected. If the Auto read memory option is selected in the J-LINK SETTINGS section, the memory layout will update. If it is not selected and you wish to see the memory layout, click Read in the DEVICE section.
Click Add file in the FILE section, and select Browse.
Navigate to where you extracted the firmware, and then to the
img_app_blfolder there.Select the
.hexfile for your DK for the application you are programming:nRF9160 DK:
nrf9160dk_asset_tracker_v2_<version-number>.hexnRF91x1 DK:
nrf9161dk_asset_tracker_v2_<version-number>.hex
For NB-IoT, there is a second variant of the Asset Tracker v2 firmware in the file ending with
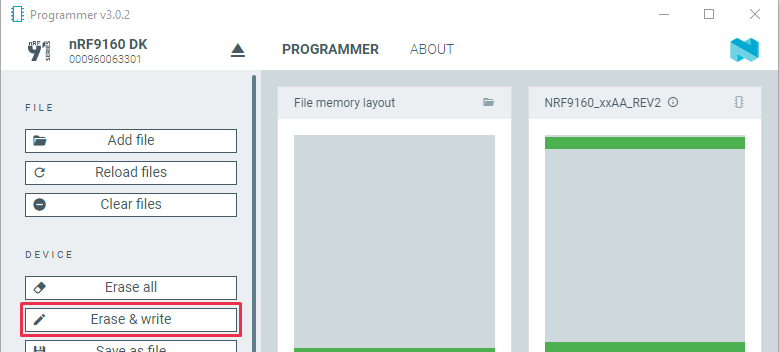
*_nbiot_legacy_pco_<version-number>.hex. Only use this legacy variant if your network does not support ePCO.Click the Erase & write button in the DEVICE section to program the DK. Do not unplug or turn off the DK during this process.
Programmer - Erase & write


