Raspberry Pi Pico
Overview
The Raspberry Pi Pico is a small, low-cost, versatile board from Raspberry Pi. It is equipped with an RP2040 SoC, an on-board LED, a USB connector, and an SWD interface. The USB bootloader allows it to be flashed without any adapter, in a drag-and-drop manner. It is also possible to flash and debug the Pico with its SWD interface, using an external adapter.
Hardware
Dual core Arm Cortex-M0+ processor running up to 133MHz
264KB on-chip SRAM
2MB on-board QSPI flash with XIP capabilities
26 GPIO pins
3 Analog inputs
2 UART peripherals
2 SPI controllers
2 I2C controllers
16 PWM channels
USB 1.1 controller (host/device)
8 Programmable I/O (PIO) for custom peripherals
On-board LED
1 Watchdog timer peripheral
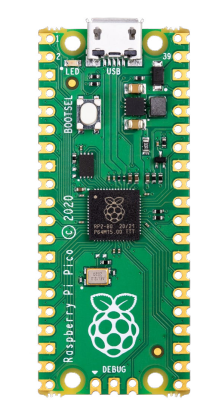
Fig. 167 Raspberry Pi Pico (Image courtesy of Raspberry Pi)
Supported Features
The rpi_pico board configuration supports the following hardware features:
Peripheral |
Kconfig option |
Devicetree compatible |
|---|---|---|
NVIC |
N/A |
|
UART |
|
|
GPIO |
|
|
I2C |
||
USB Device |
||
HWINFO |
N/A |
|
Watchdog Timer (WDT) |
||
PWM |
Programming and Debugging
Flashing
Using an SWD adapter
The Raspberry Pi Pico has an SWD interface that can be used to program and debug the on board RP2040. This interface can be utilized by openocd. However, to use it with the RP2040, a custom fork of openocd is needed. This fork can be found here: https://github.com/raspberrypi/openocd
Depending on the interface used (such as JLink), you might need to checkout to a branch that supports this interface, before proceeding. Build and install openocd as described in the README.
When openocd is installed, you can flash the board with the following command (assuming JLink is used):
$ openocd -f interface/jlink.cfg -c 'transport select swd' -f target/rp2040.cfg -c "adapter speed 2000" -c 'targets rp2040.core0' -c 'program path/to/zephyr.elf verify reset exit'
Using UF2
If you don’t have an SWD adapter, you can flash the Raspberry Pi Pico with a UF2 file. By default, building an app for this board will generate a build/zephyr/zephyr.uf2 file. If the Pico is powered on with the BOOTSEL button pressed, it will appear on the host as a mass storage device. The UF2 file should be drag-and-dropped to the device, which will flash the Pico.
Debugging
The SWD interface can also be used to debug the board. To achieve this, install openocd as described for flashing the board. Also, install gdb-multiarch. Then run the following command:
$ openocd -f interface/jlink.cfg -c 'transport select swd' -f target/rp2040.cfg -c "adapter speed 2000" -c 'targets rp2040.core0'
On another terminal, run:
$ gdb-multiarch
Inside gdb, run:
(gdb) tar ext :3333
(gdb) file path/to/zephyr.elf
You can then start debugging the board.