UP Squared
Overview
UP² (UP Squared) is an ultra compact single board computer with high performance and low power consumption. It features the latest Intel® Apollo Lake Celeron™ and Pentium™ Processors with only 4W of Scenario Design Power and a powerful and flexible Intel® FPGA Altera MAX 10 onboard.
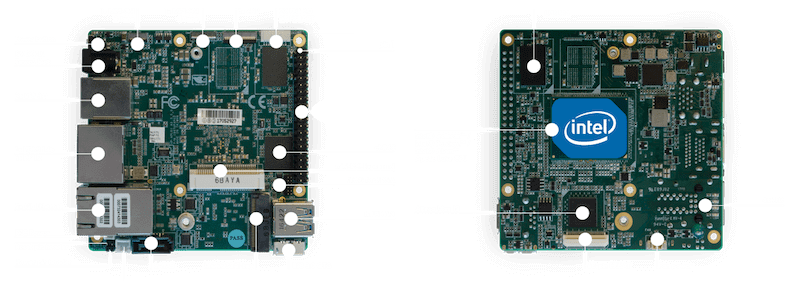
Up Squared (Credit: https://up-board.org)
This board configuration enables kernel support for the UP Squared board.
Note
This board configuration works on all three variants of UP Squared boards containing Intel® Pentium™ SoC, Intel® Celeron™ SoC, or Intel® Atom™ SoC.
Hardware
General information about the board can be found at the UP Squared website.
Supported Features
In addition to the standard architecture devices (HPET, local and I/O APICs, etc.), Zephyr supports the following Apollo Lake-specific SoC devices:
HSUART
GPIO
I2C
HSUART High-Speed Serial Port Support
The Apollo Lake UARTs are NS16550-compatible, with “high-speed” capability.
Baud rates beyond 115.2kbps (up to 3.6864Mbps) are supported, with additional
configuration. The UARTs are fed a master clock which is fed into a PLL which
in turn outputs the baud master clock. The PLL is controlled by a per-UART
32-bit register called PRV_CLOCK_PARAMS (aka the PCP), the format of
which is:
[31] |
[30:16] |
[15:1] |
[0] |
|---|---|---|---|
enable |
|
|
toggle |
The resulting baud master clock frequency is (n/m) * master.
Typically, the master clock is 100MHz, and the firmware by default sets
the PCP to 0x3d090240, i.e., n = 288, m = 15625, which
results in the de-facto standard 1.8432MHz master clock and a max baud rate
of 115.2k. Higher baud rates are enabled by changing the PCP and telling
Zephyr what the resulting master clock is.
Use devicetree to set the value of the PRV_CLOCK_PARAMS register in
the UART block of interest. Typically a devicetree overlay file would be
present in the application directory (specific to the board, such as
up_squared.overlay), with contents like this:
/ {
    soc {
        uart@0 {
            pcp = <0x3d090900>;
            clock-frequency = <7372800>;
            current-speed = <230400>;
        };
    };
};
The relevant variables are pcp (the value to use for PRV_CLOCK_PARAMS),
and clock-frequency (the resulting baud master clock). The meaning of
current-speed is unchanged, and as usual indicates the initial baud rate.
GPIO
GPIOs are exposed through the HAT header, and can be referred using
predefined macros such as UP2_HAT_PIN3. The physical pins are
connected to the on-board FPGA acting as level shifter. Therefore,
to actually utilize these GPIO pins, the function of the pins and
directions (input/output) must be set in the BIOS. This can be
accomplished in BIOS, under menu Advanced, and option
HAT Configurations. When a corresponding pin is set to act as
GPIO, there is an option to set the direction of the pin. This needs
to be set accordingly for the GPIO to function properly.
Connections and IOs
Refer to the UP Squared website and UP Squared Pinout website for connection diagrams.
Programming and Debugging
Use the following procedures for booting an image on a UP Squared board.
Creating a GRUB2 Boot Loader Image from a Linux Host
If you are having problems running an application using the preinstalled copy of GRUB, follow these steps to test on supported boards using a custom GRUB.
Install the requirements to build GRUB on your host machine.
On Ubuntu, type:
$ sudo apt-get install bison autoconf libopts25-dev flex automake \
pkg-config gettext autopoint
On Fedora, type:
$ sudo dnf install gnu-efi bison m4 autoconf help2man flex \
automake texinfo gettext-devel
Clone and build the GRUB repository using the script in Zephyr tree, type:
$ cd $ZEPHYR_BASE
$ ./boards/x86/common/scripts/build_grub.sh x86_64
Find the binary at
$ZEPHYR_BASE/boards/x86/common/scripts/grub/bin/grub_x86_64.efi.
Build Zephyr application
Build a Zephyr application; for instance, to build the
hello_worldapplication on UP Squared:# From the root of the zephyr repository west build -b up_squared samples/hello_world
Note
A stripped project image file named
zephyr.stripis automatically created in the build directory after the application is built. This image has removed debug information from thezephyr.elffile.
Preparing the Boot Device
Prepare a USB flash drive to boot the Zephyr application image on a UP Squared board.
Refer to the UP Squared Serial Console Wiki page for instructions on how to connect for serial console.
Format the USB flash drive as FAT32.
On Windows, open
File Explorer, and right-click on the USB flash drive. SelectFormat.... Make sure inFile System,FAT32is selected. Click on theFormatbutton and wait for it to finish.On Linux, graphical utilities such as
gpartedcan be used to format the USB flash drive as FAT32. Alternatively, under terminal, find out the corresponding device node for the USB flash drive (for example,/dev/sdd). Execute the following command:$ mkfs.vfat -F 32 <device-node>
Important
Make sure the device node is the actual device node for the USB flash drive. Or else you may erase other storage devices on your system, and will render the system unusable afterwards.
Create the following directories
efiefi/bootkernelCopy the kernel file
zephyr/zephyr.stripto the$USB/kernelfolder.Copy your built version of GRUB to
$USB/efi/boot/bootx64.efiCreate
$USB/efi/boot/grub.cfgcontaining the following:set default=0 set timeout=10 menuentry "Zephyr Kernel" { multiboot /kernel/zephyr.strip }
Booting the UP Squared Board
Boot the UP Squared board from the boot device using GRUB2 via USB flash drive.
Insert the prepared boot device (USB flash drive) into the UP Squared board.
Connect the board to the host system using the serial cable and configure your host system to watch for serial data. See https://wiki.up-community.org/Serial_console.
Note
On Windows, PuTTY has an option to set up configuration for serial data. Use a baud rate of 115200.
Power on the UP Squared board.
When the following output appears, press F7:
Press <DEL> or <ESC> to enter setup.From the menu that appears, select the menu entry that describes that particular type of USB flash drive.
GRUB2 starts and a menu shows entries for the items you added to the file
grub.cfg.Select the image you want to boot and press Enter.
When the boot process completes, you have finished booting the Zephyr application image.
Note
You can safely ignore this message if it appears:
WARNING: no console will be available to OS
Booting the UP Squared Board over network
Build Zephyr image
Follow Build Zephyr application steps to build Zephyr image.
Prepare Linux host
Follow Creating a GRUB2 Boot Loader Image from a Linux Host steps to create grub binary.
Install DHCP, TFTP servers. For example
dnsmasq$ sudo apt-get install dnsmasqConfigure DHCP server. Configuration for
dnsmasqis below:# Only listen to this interface interface=eno2 dhcp-range=10.1.1.20,10.1.1.30,12h
Configure TFTP server.
# tftp
enable-tftp
tftp-root=/srv/tftp
dhcp-boot=grub_x86_64.efi
grub_x86_64.efiis a grub binary created above.Create the following directories inside TFTP root
/srv/tftp$ sudo mkdir -p /srv/tftp/EFI/BOOT $ sudo mkdir -p /srv/tftp/kernel
Copy the Zephyr image
zephyr/zephyr.stripto the/srv/tftp/kernelfolder.$ sudo cp zephyr/zephyr.strip /srv/tftp/kernelCopy your built version of GRUB to
/srv/tftp/grub_x86_64.efiCreate
/srv/tftp/EFI/BOOT/grub.cfgcontaining the following:set default=0 set timeout=10 menuentry "Zephyr Kernel" { multiboot /kernel/zephyr.strip }
TFTP root should be looking like:
$ tree /srv/tftp
/srv/tftp
├── EFI
│   └── BOOT
│       └── grub.cfg
├── grub_x86_64.efi
└── kernel
    └── zephyr.strip
Restart
dnsmasqservice:$ sudo systemctl restart dnsmasq.service
Prepare UP Squared board for network boot
Enable PXE network from BIOS settings.
Advanced -> Network Stack Configuration -> Enable Network Stack -> Enable Ipv4 PXE SupportMake network boot as the first boot option.
Boot -> Boot Option #1 : [Network]
Booting UP Squared
Connect the board to the host system using the serial cable and configure your host system to watch for serial data. See https://wiki.up-community.org/Serial_console.
Power on the UP Squared board.
Verify that the board got an IP address:
$ journalctl -f -u dnsmasq
dnsmasq-dhcp[5386]: DHCPDISCOVER(eno2) 00:07:32:52:25:88
dnsmasq-dhcp[5386]: DHCPOFFER(eno2) 10.1.1.28 00:07:32:52:25:88
dnsmasq-dhcp[5386]: DHCPREQUEST(eno2) 10.1.1.28 00:07:32:52:25:88
dnsmasq-dhcp[5386]: DHCPACK(eno2) 10.1.1.28 00:07:32:52:25:88
Verify that network booting is started:
$ journalctl -f -u dnsmasq
dnsmasq-tftp[5386]: sent /srv/tftp/grub_x86_64.efi to 10.1.1.28
dnsmasq-tftp[5386]: sent /srv/tftp/EFI/BOOT/grub.cfg to 10.1.1.28
dnsmasq-tftp[5386]: sent /srv/tftp/kernel/zephyr.strip to 10.1.1.28
When the boot process completes, you have finished booting the Zephyr application image.