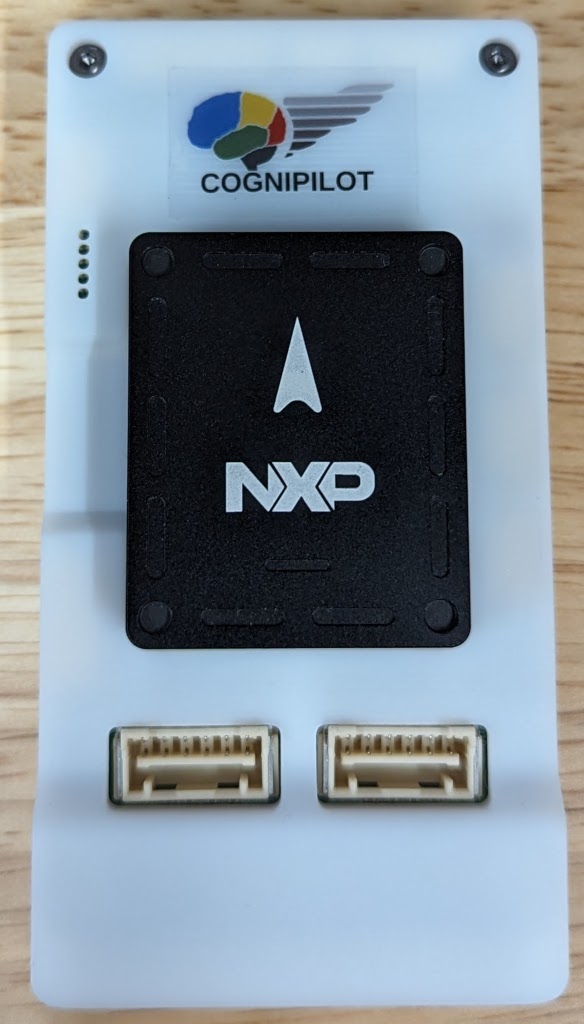
NXP VMU RT1170
Overview
The VMU RT1170 features an i.MX RT1176 dual core MCU with the Cortex-M7 core at 1 GHz and a Cortex-M4 at 400 MHz. The i.MX RT1176 MCU offers support over a wide temperature range and is qualified for consumer, industrial and automotive markets. The VMU RT1170 is the default VMU for CogniPilot’s Cerebri, a Zephyr RTOS based Autopilot.

Hardware
MIMXRT1176DVMAA MCU
1GHz Cortex-M7 & 400Mhz Cortex-M4
2MB SRAM with 512KB of TCM for Cortex-M7 and 256KB of TCM for Cortex-M4
Memory
512 Mbit Octal Flash
TF socket for SD card
Ethernet
2 wire 100BASE-T1
USB
USB 2.0 connector
Power
Redundant dual picoflex power ports
Debug
10 pin debug and shell adapter board to 20 Pin JTAG debugger and USB-C shell
Sensor
BMI088 6-axis IMU
BMM150 Magnetometer
Dual BMP388 Barometer
Dual ICM-42688 6-axis IMU
IST8310 3-axis Magnetometer
U-blox NEO-M8N GNSS module
UART JST-GH connectors
I2C JST-GH connectors
CAN bus JST-GH connectors
For more information about the MIMXRT1176 SoC and VMU RT1170 board, see these references:
Supported Features
VMU-RT1170 is a “Vehicle Management Unit” based on the general i.MX RT1170 family of processors. The VMU RT1170 board configuration supports the following hardware features:
Interface |
Controller |
Driver/Component |
|---|---|---|
NVIC |
on-chip |
nested vector interrupt controller |
SYSTICK |
on-chip |
systick |
GPIO |
on-chip |
gpio |
COUNTER |
on-chip |
counter |
CAN |
on-chip |
flexcan |
SPI |
on-chip |
spi |
I2C |
on-chip |
i2c |
PWM |
on-chip |
pwm |
ADC |
on-chip |
adc |
UART |
on-chip |
serial port-polling; serial port-interrupt |
DMA |
on-chip |
dma |
GPT |
on-chip |
gpt |
WATCHDOG |
on-chip |
watchdog |
ENET |
on-chip |
ethernet |
SAI |
on-chip |
i2s |
USB |
on-chip |
USB Device |
HWINFO |
on-chip |
Unique device serial number |
DISPLAY |
on-chip |
display |
ACMP |
on-chip |
analog comparator |
CAAM RNG |
on-chip |
entropy |
FLEXSPI |
on-chip |
flash programming |
The default configuration can be found in the defconfig file:
boards/arm/vmu_rt1170/vmu_rt1170_defconfig
Other hardware features are not currently supported by the port.
Connections and I/Os
The MIMXRT1170 SoC has six pairs of pinmux/gpio controllers.
Name |
Function |
Usage |
WAKEUP |
GPIO |
SW7 |
GPIO_AD_04 |
GPIO |
LED |
GPIO_AD_24 |
LPUART1_TX |
UART Console |
GPIO_AD_25 |
LPUART1_RX |
UART Console |
GPIO_LPSR_00 |
CAN3_TX |
flexcan |
GPIO_LPSR_01 |
CAN3_RX |
flexcan |
GPIO_AD_29 |
SPI1_CS0 |
spi |
GPIO_AD_28 |
SPI1_CLK |
spi |
GPIO_AD_30 |
SPI1_SDO |
spi |
GPIO_AD_31 |
SPI1_SDI |
spi |
GPIO_AD_08 |
LPI2C1_SCL |
i2c |
GPIO_AD_09 |
LPI2C1_SDA |
i2c |
GPIO_LPSR_05 |
LPI2C5_SCL |
i2c |
GPIO_LPSR_04 |
LPI2C5_SDA |
i2c |
GPIO_AD_04 |
FLEXPWM1_PWM2 |
pwm |
GPIO_AD_32 |
ENET_MDC |
Ethernet |
GPIO_AD_33 |
ENET_MDIO |
Ethernet |
GPIO_DISP_B2_02 |
ENET_TX_DATA00 |
Ethernet |
GPIO_DISP_B2_03 |
ENET_TX_DATA01 |
Ethernet |
GPIO_DISP_B2_04 |
ENET_TX_EN |
Ethernet |
GPIO_DISP_B2_05 |
ENET_REF_CLK |
Ethernet |
GPIO_DISP_B2_06 |
ENET_RX_DATA00 |
Ethernet |
GPIO_DISP_B2_07 |
ENET_RX_DATA01 |
Ethernet |
GPIO_DISP_B2_08 |
ENET_RX_EN |
Ethernet |
GPIO_DISP_B2_09 |
ENET_RX_ER |
Ethernet |
GPIO_AD_17_SAI1_MCLK |
SAI_MCLK |
SAI |
GPIO_AD_21_SAI1_TX_DATA00 |
SAI1_TX_DATA |
SAI |
GPIO_AD_22_SAI1_TX_BCLK |
SAI1_TX_BCLK |
SAI |
GPIO_AD_23_SAI1_TX_SYNC |
SAI1_TX_SYNC |
SAI |
GPIO_AD_17_SAI1_MCLK |
SAI1_MCLK |
SAI |
GPIO_AD_20_SAI1_RX_DATA00 |
SAI1_RX_DATA00 |
SAI |
Serial Port
The MIMXRT1170 SoC has 12 UARTs.
Programming and Debugging
Build and flash applications as usual (see Building an Application and Run an Application for more details).
Configuring a Debug Probe
A debug probe is used for both flashing and debugging the board.
Using J-Link
Install the J-Link Debug Host Tools and make sure they are in your search path.
Connect the J-Link debugger through the debug adapter board.
Configuring a Console
Use the USB-C from the debug adapter board to access the console with the following settings for your serial terminal of choice (screen, minicom, putty, etc.):
Speed: 115200
Data: 8 bits
Parity: None
Stop bits: 1
Flashing
Here is an example for the Hello World application.
# From the root of the zephyr repository
west build -b vmu_rt1170 samples/hello_world
west flash
You should see the following message in the terminal:
***** Booting Zephyr OS v3.4.0-xxxx-xxxxxxxxxxxxx *****
Hello World! vmu_rt1170
Debugging
Here is an example for the Hello World application.
# From the root of the zephyr repository
west build -b vmu_rt1170 samples/hello_world
west debug
Open a serial terminal, step through the application in your debugger, and you should see the following message in the terminal:
***** Booting Zephyr OS v3.4.0-xxxx-xxxxxxxxxxxxx *****
Hello World! vmu_rt1170
