 |
nRF51 SDK - S110 SoftDevice
|
|
nRF51 SDK - S110 SoftDevice
|
The Blood Glucose Application is a firmware example that implements the Blood Glucose profile using the hardware delivered in the nRF51822 Development Kit.
The source code and project file can be found in the <InstallFolder>\Nordic\nrf51822\Board\nrf6310\s110\ble_app_gls folder.
The application includes the two services in the Blood Glucose profile:
In addition, use of the Battery Service is also demonstrated.
When the application starts, a timer for generating battery measurements is started.
The actual measurements are hard coded values and gets added when connected and bonded to a central, at each press of the button 0. The timestamps are simulated and it uses the Record Access Control point and implements the filtering on sequence number. It supports only glucose measurement characteristic, not glucose context.
Instructions on how to set up the nRFgo Motherboard: nRFgo Motherboard Setup (nRF6310).
LED assignments:
Buttons assignments:
The Blood Glucose Meter Profile uses the Record Access Control Point characteristic to access all measurements. This means that the sensor does not automatically send new measurements, the collector has to fetch them writing request to the control point (see http://developer.bluetooth.org/Pages/default.aspx for more detail on the RACP characteristic).
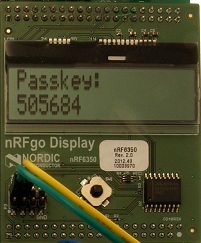
The Blood Glucose Application is able to use the nRF6350 Display to secure the bonding using Man-in-the-Middle protection (MITM). If the nRF6350 Display is available and connected according to the setup found in nRFgo Motherboard Setup (nRF6310) , then the Blood Glucose Application will present a passkey during bonding.
The passkey must be entered at the central to complete the bonding and ensure MITM protection.
The Glucose Meter Application can be tested using the "nRF Toolbox" app, available on both iOS (Apple Store) and Android (Google Play).
It can also be tested using the Master Control Panel as follows:
 1.8.3.1
