|
nRF5 IoT SDK
v0.9.0
|
|
nRF5 IoT SDK
v0.9.0
|
The nRF BLE Joiner is the new Android-based IoT application geared to commission Bluetooth Smart based 6LoWPAN nodes to a desired cloud service. The mobile application has been designed to scan and filter the IPSP enabled BLE devices and configure them to connect to the local 6LoWPAN network using the SSID and Passphrase (this could be the same as the Wi-Fi network on the same router). In addition to configuring the BLE nodes, you can manually scan and configure the local Wi-Fi network that might be used in the nRF IoT Joiner application.
Having Wi-Fi access on the router is not mandatory - the Router daemon may be configured with a static SSID and Passphrase manually.
Download the nRF BLE Joiner application from either the Google Play Store or Nordic's GitHub page.
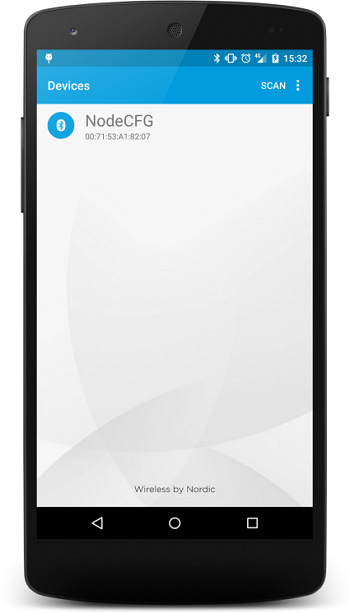
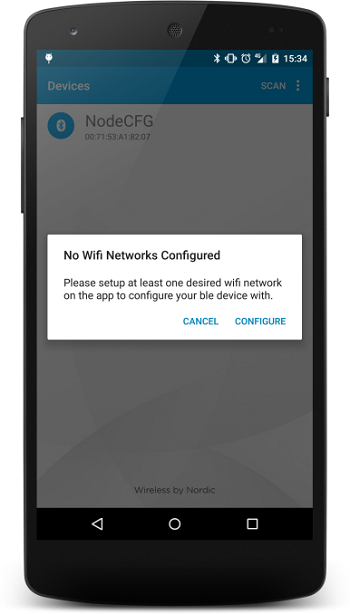
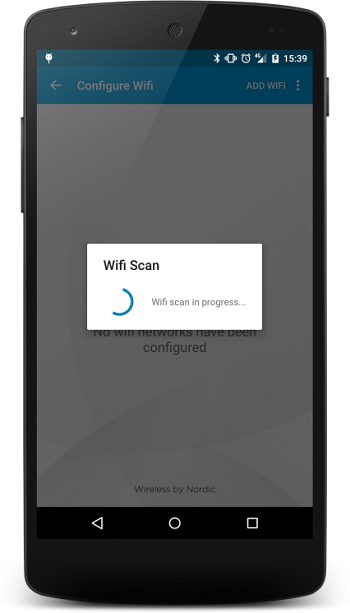
Select the list of devices to find and configure your BLE device. You will have to preconfigure the credentials in order to join your device, as mentioned before. This can be done either by tapping on the options menu at the top right hand corner of the application or by continuing to configure the BLE device itself. You will be prompted to configure a Wi-Fi network at this point.
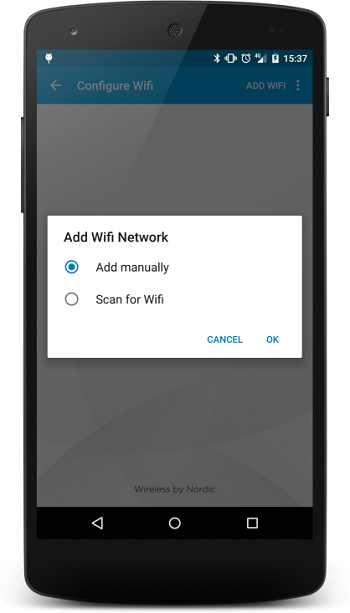
Tap Configure to navigate to a new screen where you can add a new Wi-Fi network. Tap on the button on the toolbar at the top of the screen. You will be prompted again to select a method to add a Wi-Fi network.
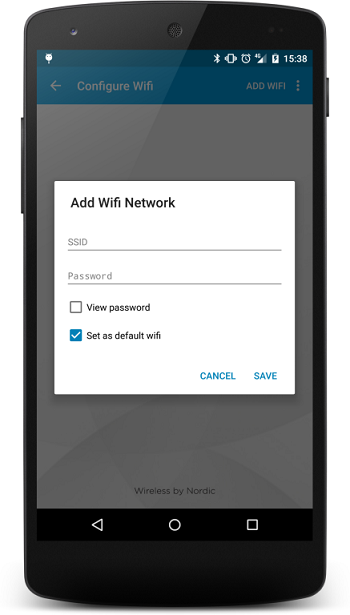
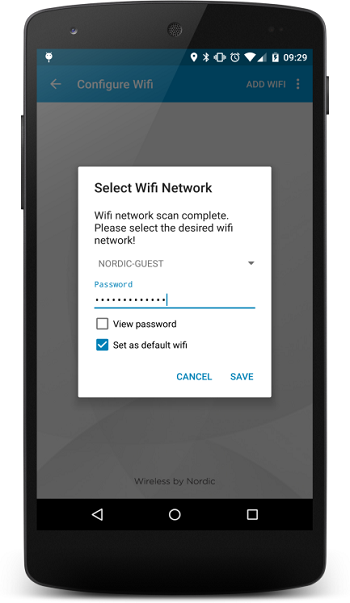
If you choose the Add manually option, you will have to enter the Wi-Fi SSID and the Passphrase in the fields provided on the screen below (see Figure 4). There is also an option where you can set the Wi-Fi network as default, so when configuring a BLE device you will not be prompted again to choose a Wi-Fi network in the case where there can be multiple Wi-Fi networks. The Wi-Fi networks can be edited by tapping Edit next to each Wi-Fi network on the Wi-Fi network list.
After completing these steps, you can go back by tapping the navigation button at the top of the screen or the back button on the phone to return to the BLE devices screen. You can now tap on a device and the application will connect to the device via Bluetooth Smart in order to configure the particular node. Now you will be prompted with three options:
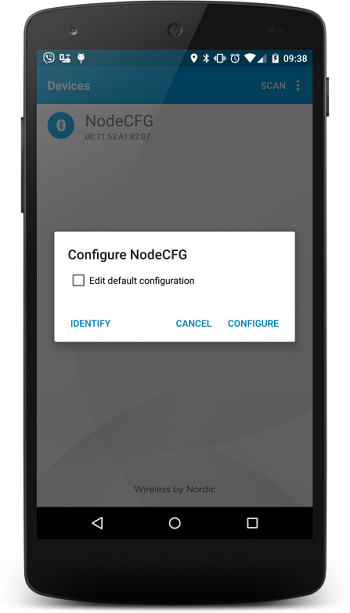
Select Identify to see which device your phone is connected to. You will see a blinking LED on the BLE device. This is useful if you have multiple BLE devices nearby.
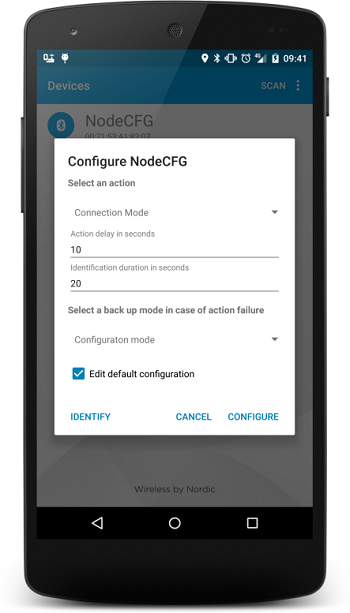
The Edit configuration checkbox displays some advanced configuration options supported by the application which you can edit. The application is preconfigured by default with preset values which allow a time frame for the BLE device to connect to the local router. This would be an action delay where the BLE node waits for a time frame (in seconds) before trying to connect to the local router with the information and a backup mode to which the device will fall back to in the case of failure to connect to the router. The presets and the time frames (in seconds) provided here are already preconfigured, but you can change them according to your requirements. There is also a field named Manufacture Specific Data where you can pass some information to the BLE node. After selecting Configure, this information is passed on to the node via BLE. Based on the configuration you provided, the device will try to connect to the local router in range.
Configure shown in Figure 8 sets the presets provided by default in the application, which is to connect to the local 6LoWPAN network.
Currently a node that has been joined to a 6LoWPAN network does not communicate success or failure of the ongoing operation back to the phone.
 1.8.3.1
